 Carvect™
Tabs, lead-ins, and the last pass
Three small settings on the profile form decide whether your part stays put, whether the entry shows on the edge, and whether the wall is straight. None of them is optional in practice.
A profile cut all the way through releases the part. What happens in the last few seconds of that cut is the difference between a finished piece and one the spindle has thrown across the shop.
Holding tabs
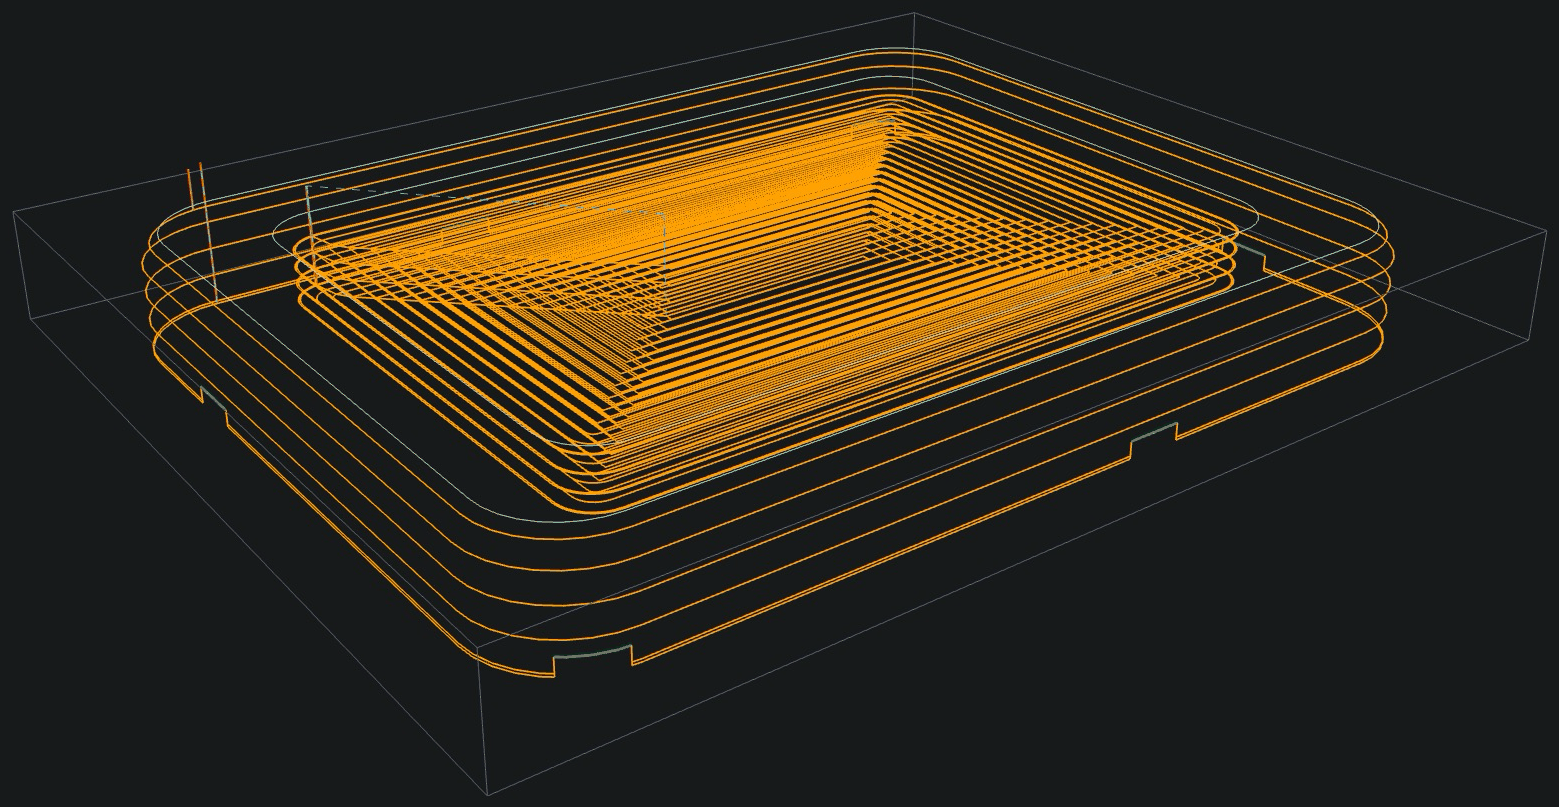
A tab is a short section where the toolpath lifts to leave a bridge of material joining the part to the sheet. Two questions matter: how many, and how tall. Too few and a long part still lifts at the far end; too tall and you are sawing the part free afterwards and damaging the edge you just cut.
As a starting point, four tabs around a hand-sized part, each roughly the tool's diameter long, and tall enough to be about a quarter of the stock thickness. Place them where a saw cut and a sanding block can reach — on a straight edge, not on a curve or a corner you care about.
Lead-ins and lead-outs
Entering the cut by plunging straight down onto the line leaves a witness mark: the tool is momentarily cutting on all sides, deflects, and the finished wall carries a dimple where it started. An arc lead-in brings the cutter onto the line tangentially from clear air, so it is up to full engagement before it touches the finished edge. The lead-out does the same in reverse.
The radius wants to be at least the tool's radius and to fit in the space available — on an inside profile, the lead-in has to live inside the pocket, which is the usual reason a generous radius is rejected.
The last pass
Cutting to the final line on every depth pass means the wall is made of a stack of separate cuts, each with its own deflection. Leaving a small allowance on the wall for all the roughing passes and removing it in one full-depth finishing pass gives a wall cut in a single continuous motion — straighter, and visibly better on anything that will be seen from the side.
In Carvect: tab count, tab length and tab height are on the profile form, with manual placement available if the automatic spacing puts one somewhere awkward; lead-in and lead-out radii sit beside them; the finishing pass is the last-pass option, with its own allowance and an option to run it in the opposite direction.